Sunday, 16 March 2014

Shower Tray......again

Well despite my best efforts at repairing the shower tray, after an extremely bumpy trip, the aqua rolls and waste caused a further split where the expanding foam had reached.  Luckily, the shower tray below came up on good old fleabay for a reasonable sum.


I decided to try and reinforce the shower tray with fibreglass, in the hope it will prevent any splits at any weak points.  Fortunately I got a good sunny day in the garden as this stuff stinks!


Now to removed the toilet and old shower tray.  First to figure out how  to get the trim off at the back of the toilet!!!  Had to go gently as I didn't have a replacement!!


Got the trim off, and then outside to removed the cassette and take the three screws out holding in the toilet.  One at the back and two in the floor.

That done I could then removed the toilet as you see below.


I then removed the old show tray and started to remove the expanding foam that had been inserted under the old tray to help fill any voids.

It looks patchy because some was under the floor covering.  Once I had removed this along with the floor covering, I replaced it with some insulating membrane, and I also put a thin piece of foam insulation down before laying the new shower tray down.  This will hopefully prevent any voids.


I was really pleased to discover it was as a dry as a bone underneath and in the corners!  Replacement shower tray down and toilet brace board screwed back into place.  Now to put the toilet back and secure in place with screws from outside.


Job done - no movement and looking forward to trying it out! 


Am tempted to paint it with the rubberised paint as preferred it white!

Now just need to figure out how to fix the 3 way fridge which only seems to be working 1 way - on GAS

Friday, 1 November 2013

Cakes, Cakes and more cakes...

Seeing as i've not had much to do on the caravan, i've been doing some more baking....


Even bought myself a little diary for any cake orders I may get.......


Have an order for the Peppa Pig cake.......
 We have managed a few trips away in the van in between me baking cakes...


Thursday, 23 May 2013

My other hobby - baking and cake decorating...

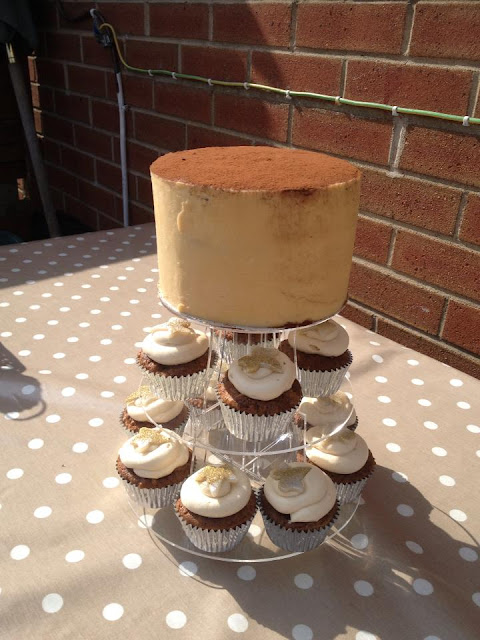
So we all know I like a bit of DIY and happy using my hands - well baking is my next hobby and one that everyone benefits from.  My neighbors get to try my cakes on a regular basis as do my work colleagues.  Here are my efforts so far....


I make this praline meringue every Christmas - it's a family favourite and feeds the masses!


This was my first attempt at icing a large maderia cake and rose water cupcakes and was for my 40th birthday.


I had a go at some vanilla flake cupcakes, some mint choc cupcakes and some lemon top cupcakes and this little batch went to work colleagues.


These were for my daughters nursery for Easter break - we got a lovely thank you card.

My next effort was a giant cupcake - but I wasn't happy with it and not sure if I will do another.


These cakes were for my brothers birthday and I used Peggy Proschen's Boutique Baking Book for the recipe for sticky toffee cup cakes and caramel layer cake.  It went down a storm.


This next cake was for my Mother and Father-in-law's 40th Wedding anniversary.  It's a limoncello layer cake and raspberry and limoncello cupcakes.  Very light and refreshing and was served after dinner.  The roses and leaves were my first proper attempt at sugar craft and not just cutting out fondant like on my earlier cakes.


My next cake was to attempt chocolate ganache - this was a chocolate orange layer cake with ganache and chocolate orange cupcakes with chocolate butter icing.  The neighbors and work colleagues got this cake.

My next test was making more flowers as my cousin has asked me to make her wedding cake, she is wanting a cutting cake and 84 cupcakes!


She is planning on having calla lillies and pink roses......practice makes perfection....so I will have to do a fair amount of practicing!!


Do you know who it is yet???????????


Mr Tumble....my Godson's birthday is coming up so had a go at my first gumpaste figure - Mr Tumble is his favorite and my daughters, who keeps hunting for him to eat him!! lol

After attempting this when a work colleague said her daughter wanted a Fireman Sam cake but she couldn't find one - I said I would give it a go....


This is my effort - the little girls mother is very pleased with it - so now just have to make the cake ready to put Fireman Sam on top.


Wednesday, 22 May 2013

Cracked Shower Tray - Elddis Typhoon

Since we bought the van there have been a few cracks in the shower tray that had been filled with silicone.  I've removed most of the silicone so that you can see.  The main reason for this is the void beneath the shower tray.  This has unfortunately meant that any weight has allowed for movement in the shower tray and split the tray at the weak points on the bends.


Above you can see the crack that sits just below the toilet.

Yes this is me in my dressing gown and pj's!

Above you can see the crack close to the toilet/shower room door.


From reading up on this, the trick is to fill the void to prevent any repair work being damaged by continued movement.  The way to do this is to drill a hole at either end of the crack to prevent further spreading of the crack and also to drill holes into the tray to allow access to insert nozzle for expanding foam.

To do this I placed masking tape over the shower tray and then drilled holes in particular areas where there was excessive movement.


I inserted the flexible nozzle after shaking the can well, and deployed the expanding foam.  Once I had done this I placed a plastic bag down as you can see above and weighted it down with a aqua roll.


After this was left overnight to harden I removed the excess foam by pulling the masking tape away, I found some areas that still required some more foam so repeated the procedure.  You can see the excess foam escaping.


This foam wasn't too bad to work with at all.  But do not get it on your hands or clothes as it's hard to get it off!


After a few days the masking tape and excess foam was removed and Plastic Padding Gelcoat Filler was applied to the cracks after they had been keyed by sanding.


This takes an hour to harden after been applied, after an hour you can sand it with course wet and dry paper, and it does come away quite well - but my hands are suffering.


Above you can see the results of sanding with course wet and dry.  The next step is to sand it with fine wet and dry sandpaper all over the tray, this will help to key it ready for the paint covering I have.


The above area needs another sanding of course paper after I refilled the heavy crack beneath the toilet bowl.

I have bought a rubberised texture paint to apply to the shower floor.  It's made by Fascinating Finishes and can found HERE.  This link points to the cream satin paint - I however have bought the white textured non-slip finish paint as my shower tray should be white.  They say this should give an average sized shower tray two coats.  It allows for flexing and fills any hair line cracks.  

After posting about my repair on UKCampsite Repair Forum - Cracked Shower Tray , a fellow member of the site recommended the 'new kid on the block' for filling holes, demonstrated here on YouTube.  Now as the foam lifted my shower tray I only had a fine crack so happy with the Gelcoat but this is an excellent product.  UKCampsite is such a fantastic forum for great advice from helpful members - thanks Jeff.

So a final sanding and the kit is ready to embark.


First the pink stuff is used to clean the shower tray and then a fine sanding with wet & dry paper.


Right that's done - there are a couple of hairline stress cracks on the corner bends and close to the plug hole, but now that the shower tray is supported with foam that should not cause a problem. The rubberised paint is mixed well and applied with a brush over all of the drilled and filled holes, the filled cracks and the stress cracks mentioned already.  An overlap of 25mm is needed. 


So I've applied the coating as mentioned above.  Now to leave this to dry - going to give it two hours.  Will then apply the first coat all over the tray.  Will mask of the tray to do this.


First coat applied.....


That's a better view - looks very white at the moment....


Will wait for this to dry 6 hours before applying 2nd and final coat.  Ready for standing on in 48 hours after that.

Second coat applied.....enough paint left for a third coat - would be rude not too!  So will wait until tomorrow morning now.  Then Sunday it will be ready.


As the paint is fresh it's got a shine, but when it dries it has a matt non slip finish.

So to recap - lets do a comparison.....


Third and final coat applied - with some paint still to spare so impressed with the coverage of this stuff.


Right have gone in today to inspect, another 24 hours before it's fully cured and I can then silicone seal the area.  Then to buy a shower curtain which i've spotted on ebay for £20 delivered, that seems a bit steep - might have to look around.


You can now see the matt appearance rather than shiny.


I've tried to capture a close up of the textured finish - almost has the appearance of wood chip only finer - so not really at all like the appearance of wood chip!! lol


Time to stand back and admire my handy work.  So far so good.  

This isn't the only new floor covering, we had a new carpet fitted to the van throughout, the faded green one had seen better days and hubby wanted one that would make the van seem warmer.  Although I have said it will show more bits.


Cost us £10 quid for the carpet, had a fitter fit it, had some remnants so had two rugs made one for in front of the cooker and one for the bathroom area as it's a pivot area in the van.  The edges were bound for the price of £20 at Terry's Carpets - Redcar.  So all in all very happy with how it's looking.